“Quality is Everything”
July 3, 2021 4:31 pm
New Volkswagen production facility performs in-line inspections with the ZEISS AIMax
Once production is going full throttle in 2018, 100,000Crafter and MAN TGE vans will roll off the assemblyline each year – that is twice as many as VolkswagenCommercial Vehicles (VWCV) currently sells annually. The 121stVW factory marks a paradigm shift in Volkswagen‘s companystrategy. For many years, VW had Daimler produce its small vans,but when the cooperation agreement with the Stuttgart-basedcompany expired, VWCV opted to produce the Crafter vans itself – a move prompted by the rapid growth of online commerce andthe resulting need for more transportation options. Following asite analysis in 2013, VW Management decided to construct anew factory in Poland for assembling the van. The speed at whichthis enormous factory – one-kilometer long and 400 meters wide– was built is a testament to the enthusiasm for the project.Construction was completed in just 23 months, morethan six months ahead of schedule. And, while all this wasgoing on, VWCV was developing the new Crafter. The companyheadquartered in Wolfsburg, Germany, ultimately spent 800million euros on the site in Września, and this investment isexpected to pay off quickly. Werner Steinert, Head of PWQ- 3/1QS-Analysis/Metrology in Września, is absolutely certain it will:“I see a bright future for this site.“
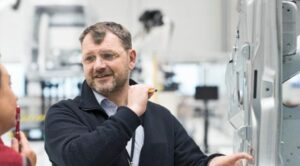 Werner Steinert, Head of PWQ-3/1 QS- Analysis/Metrology in Września: “This speed allows us to inspect a lot of characteristics on our car body parts within the prescribed cycle time. This has helped us enormously with optimising our processes.“
The Crafter van – designed to meet every need
There are lot of reasons for Steinert‘s optimism. For him,an important factor for the market success of the Crafter, inaddition to the quality of the vehicle, is the wide array of modelsavailable. Crafter comes in 29 different models, and in the futurethere will be 60 base versions.
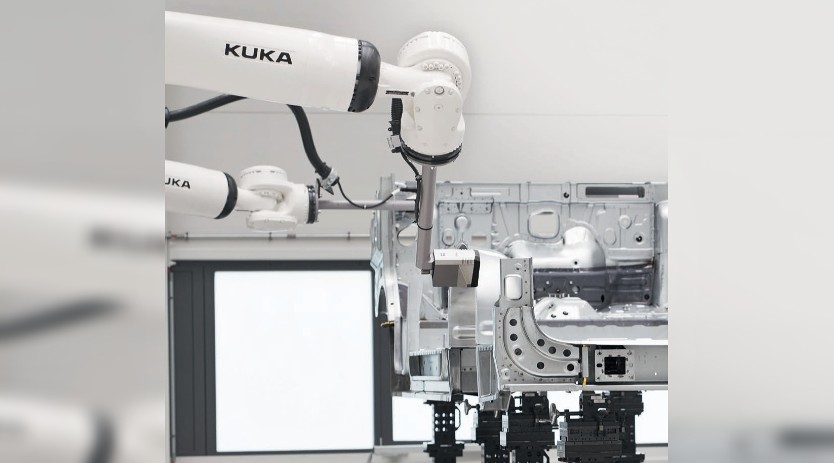
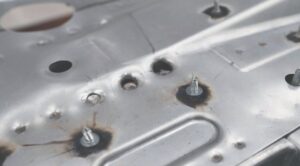 The ZEISS AIMax makes it possible to measure complex geometric characteristics like special boreholes and holes as well as screw threads, gaps and flush.
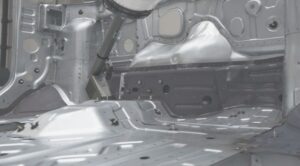 The compact design of the ZEISS AIMax sensor makes it possible to measure all geometric characteristics on the car body parts without any difficulty.
Optical measuring methods for optimum quality
The Quality Manager in Poland is certain that “no other automobilemanufacturer is using as many optical measuring methods as we areat our measuring lab in Września.“ Even the term “measuring lab”does not do justice to the enormous hall where measurements are
performed: spread out over 1,550 m2 and with a height of 14 meters,it is always 20 degrees in this climatised space. Alongside multipleset-up locations, the measuring lab houses one measuring stationwith four coordinate measuring machines as well as six measuringstations where measurements are performed with optical sensors.Steinert helped develop this innovative approach himself: “And ithas worked out great.“ Part of the elaborate design is an offlinestation in the measuring lab, with four ZEISS AIMax sensors fromCarl Zeiss Industrielle Messtechnik GmbH which have been set upjust like the in-line stations on the production line. “This approachhas more than paid off,“ reports the Quality Manager. Thanks to thisstation, the Polish engineers under Steinert‘s supervision work inthe measuring lab programming the software for multiple in-linestations.
Steinert explains: “This requires actually programming robots,which is quite a challenge.“ The software for controlling the robotsis installed with just a click of the mouse, meaning there is onlya slight delay in Production when the new program is run. “If wedid not have the offline station, then we would continually beinterrupting production to program the in-line stations,““We wanted a partner that has skilled employees who can also workunder extreme time pressure,“ says Steinert. “It was already clearafter the first few weeks of production that the in-line approachwas the way to go.“ All five stations work perfectly. “I wouldcertainly opt for ZEISS again,“ says Steinert.Performing 100 percentage inspection in Poland. This means that every carbody part – from the undercarriage to the side panels – passes throughthe corresponding in-line measuring station. The undercarriages for thedifferent models vary the most, and for this part between 82 and 122measurement points are inspected to ensure the stipulated tolerance
One system – three measuring methods
To ensure that even difficult-to-reach characteristics on the carbody parts are inspected perfectly, six axis robots with a largerange of motion are used. And thanks to the compact design ofthe AIMax sensor (height: 155 mm, width: 134 mm, length: 125mm), even those characteristics in narrow or difficult-to-reachareas on the car body can be inspected. “This makes the ZEISSAIMax so well-suited for in-line inspection,“ says Steinert. Thecombination of three measuring principles in a single sensor –multi-line triangulation, gray- scale image processing and shadowanalysis – is another plus for car body manufacture. These threemeasuring principles make it possible for the ZEISS system tomeasure complex geometric characteristics like special boreholes,holes, screw threads, weld nuts, gaps and flush. “Welded studs, andwe have a lot of those, can only be measured in-line with the ZEISSAIMax,“ says Steinert, who was already familiar with the ZEISSsystem from a VW plant in Russia.
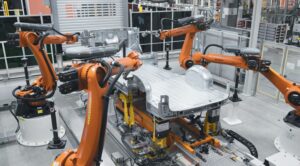
Keeping an eye on the entire production line
All car body parts are inspected. “This way we know immediatelywhere we need to modify our processes,“ says Steinert. Beforecoming to Poland, he worked in Russia where he was responsiblefor ensuring that the cars produced there met the company‘srequirements. For Quality Assurance employees, monitoring the inlinestations is straightforward. The monitor at each station showsthem how close specific characteristics are to exceeding tolerance.“We start paying very close attention once tolerance utilisationhits 75 percentage,“ says Steinert. Employees check how the valueshave changed on a daily basis or even after each shift. Stoppingthe production line because of exceeded tolerances is a situationto be avoided at all costs. Often the engineers from the QualityAssurance department can already identify the cause of tolerancedeviations by examining the photographs taken by the camera onthe ZEISS sensor for the particular characteristics and which aresaved as needed. “This makes it easy for us to determine if there issomething like glue in the boreholes,“ says Steinert. This is just asimple example of how the data acquired from the in-line stationshelps the quality managers at VW improve the manufacturingprocesses at the plant.“
Since we perform optical measurements, we have a true- to-life 3Dmodel of the workpieces. We will use this to display defects virtuallyand in a way that makes an even greater impression on suppliers,“ saysthe Quality Manager. Excited about what the future holds, Steinertis confident that this approach “will further increase the level ofawareness of quality for all involved.“
Cookie Consent
We use cookies to personalize your experience. By continuing to visit this website you agree to our Terms & Conditions, Privacy Policy and Cookie Policy.







 English
 Hindi
Hindi